Esta vez ha tocado el turno de dockerizar Symfony, normalmente en mi entorno de trabajo tengo todo dockerizado para poder tener las mismas características que los servidores donde subimos el código o tal vez probar una versión nueva.
Recuerda que este tutorial va de la mano de Traefik que lo tenemos como proxy, si quieres saber como instalarlo y configurarlo puedes seguir este tutorial que realice en su momento Docker + Traefik + Soketi
En Laravel lo tengo así, pero no había probado con Symfony, así que os dejo aquí por si a alguno le sirve, la forma como lo he hecho.
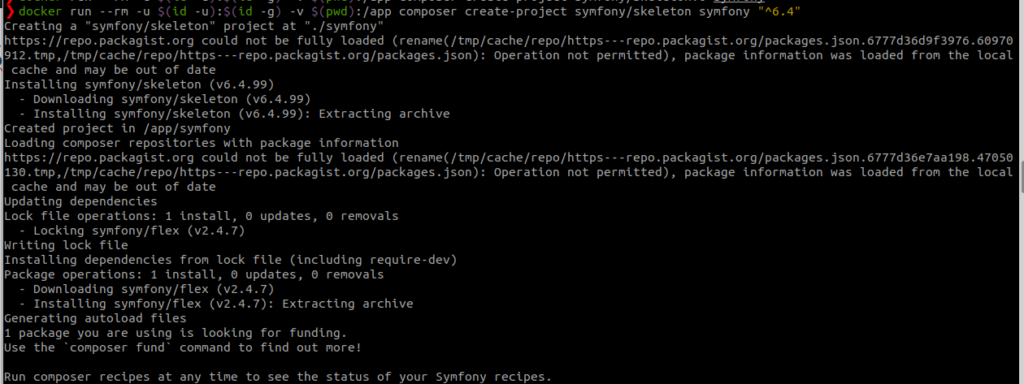
Primeramente vamos a instalar Symfony usando composer, yo he usado una imagen de composer, viendo la documentación en Symfony la versión LTS es la 6.4.X este mismo proceso se puede aplicar para la última versión que actualmente a la fecha de esta publicación es la 7.X
docker run --rm -u $(id -u):$(id -g) -v $(pwd):/app composer create-project symfony/skeleton symfony "^6.4"
Dentro de este directorio creamos una carpeta llamada docker y creamos un archivo .env, en el agregaremos una serie de variables de entorno para poder levantar nuestro Symfony con Docker.
En mi caso como quiero usarlo con Mysql, he reutilizado las variables de entorno que uso en Laravel, dependerá de tu configuración para adaptarlo a tus necesidades.
Agregamos estos datos al archivo .env
DB_HOST=symfony6_db
DB_PORT=3306
DB_DATABASE=symfony6
DB_USERNAME='tu-usuario'
DB_PASSWORD='tu-clave'

IMAGE_PHP="ssheduard/php:8.3-fpm-alpine"
NETWORK="traefik_net"
El siguiente paso va ser crear nuestro archivo docker-compose.yml donde vamos a tener Nginx/Mysql/Php
version: "3.7"

services:
    symfony6_nginx:
        image: nginx:1.23.0-alpine
        container_name: symfony6_nginx
        restart: unless-stopped
        labels:
            - "traefik.enable=true"
            - "traefik.http.routers.symfony6_nginx.rule=Host(`symfony6.local`)"
            - "traefik.http.routers.symfony6_nginx.entrypoints=web"
        volumes:
            - ./nginx/nginx.conf:/etc/nginx/nginx.conf
            - ./nginx/conf.d/:/etc/nginx/conf.d/
            - ../:/var/www
        depends_on:
            - symfony6_php
        links:
            - symfony6_php

    symfony6_php:
        image: ${IMAGE_PHP}
        container_name: symfony6_php
        restart: unless-stopped
        volumes:
            - ../:/var/www
            - ./php/local.ini:/usr/local/etc/php/conf.d/local.ini
        environment:
            PHP_OPCACHE_VALIDATE_TIMESTAMPS: "1"
        working_dir: /var/www

    symfony6_db:
        image: mysql:8.0
        restart: unless-stopped
        container_name: symfony6_db
        tty: true
        ports:
            - "33021:3306"
        environment:
            MYSQL_DATABASE: ${DB_DATABASE}
            MYSQL_ROOT_PASSWORD: ${DB_PASSWORD}
            MYSQL_PASSWORD: ${DB_PASSWORD}
            MYSQL_USER: ${DB_USERNAME}
            TZ: Europe/Madrid
        volumes:
            - dbdata:/var/lib/mysql/
            - ./mysql/my.cnf:/etc/mysql/my.cnf

#Docker Networks
networks:
    default:
        external: true
        name: ${NETWORK}

#Volumes
volumes:
    dbdata:
        driver: local
Ahora como último paso vamos a crear una serie de carpetas donde vamos a dejar nuestras configuraciones, tanto para php, mysql y nginx.
Debemos crear esta estructura de carpetas e iremos agregando una serie de archivos en cada una de ellas.

Vamos a abrir la carpeta nginx/config.d y crearemos el archivo default.conf y dentro agregamos esta configuración
server {
    listen [::]:80 default_server;
    listen 80 default_server;
    server_name _;

    sendfile off;

    root /var/www/public;
    index index.php index.html;

    location / {
        # First attempt to serve request as file, then
        # as directory, then fall back to index.php
        try_files $uri $uri/ /index.php?$query_string;
    }


    # Pass the PHP scripts to PHP-FPM
    # Change php-fpm endpoint. E.g: php-fpm:9090 (service_name:port)
    location ~ \.php$ {
        try_files $uri =404;
        fastcgi_split_path_info ^(.+\.php)(/.+)$;
        fastcgi_pass symfony6_php:9000;
        fastcgi_param SCRIPT_FILENAME $document_root$fastcgi_script_name;
        fastcgi_param SCRIPT_NAME $fastcgi_script_name;
        fastcgi_index index.php;
        include fastcgi_params;
        # Set the "fastcgi_read_timeout" parameter
        fastcgi_read_timeout 600;
    }

    # Deny access to dot files by default
    location ~ /\. {
        log_not_found off;
        deny all;
    }

}
Debemos tener en cuando que debemos agregar en fastcgi_pass el nombre que asignamos a php (symfony6)
fastcgi_pass symfony6_php:9000;Ahora en la carpeta mysql creamos el archivo my.cnf, dentro debemos agregar estos datos.
[mysqld]
general_log = 1
general_log_file = /var/lib/mysql/general.log
Vamos con la carpeta php y dentro crearemos el archivo local.ini y agregamos el siguiente contenido.
[PHP]
memory_limit = 256
upload_max_filesize = 10M
post_max_size = 10M
max_execution_time=300

[opcache]
opcache.enable = 1
opcache.enable_cli = 1
opcache.memory_consumption = 256
opcache.max_accelerated_files = 20000
opcache.validate_timestamps = 1
opcache.revalidate_freq = 0
opcache.preload_user = www-data

; Configuración recomendada para desarrollo
opcache.consistency_checks = 1
opcache.validate_permission = 1
opcache.file_cache = /tmp
Recuerda adaptarlo a tus necesidades el archivo local.ini
Y por último nos queda crear este archivo nginx/nginx.conf, el cual vamos a agregar estos datos.
# Sets the worker threads to the number of CPU cores available in the system for best performance.
# Should be > the number of CPU cores.
# Maximum number of connections = worker_processes * worker_connections
worker_processes auto;

# Log errors and warnings to this file
# This is only used when you don't override it on a server{} level
error_log /dev/stderr warn;

user nginx nginx;

# Maximum number of open files per worker process.
# Should be > worker_connections.
worker_rlimit_nofile 8192;

events {
  # If you need more connections than this, you start optimizing your OS.
  # That's probably the point at which you hire people who are smarter than you as this is *a lot* of requests.
  # Should be < worker_rlimit_nofile.
  worker_connections 8000;
}

# The file storing the process ID of the main process
pid /run/nginx.pid;

# Free some CPU cycles
timer_resolution 500ms;

http {
    include       mime.types;
    default_type  application/octet-stream;

    add_header X-Frame-Options SAMEORIGIN;
    add_header X-Content-Type-Options nosniff;
    add_header X-XSS-Protection "1; mode=block";

    # Define custom log format to include reponse times
    log_format main_timed '$remote_addr - $remote_user [$time_local] "$request" '
                          '$status $body_bytes_sent "$http_referer" '
                          '"$http_user_agent" "$http_x_forwarded_for" '
                          '$request_time $upstream_response_time $pipe $upstream_cache_status';

    # to boost I/O on HDD we can disable access logs
    access_log off;
    error_log /dev/stderr;

     # Hide used software
    server_tokens off;

    # copies data between one FD and other from within the kernel
    # faster than read() + write()
    sendfile on;

    # the sendfile_max_chunk directive to limit the amount of data transferred in a single sendfile() call
    sendfile_max_chunk 512k;

    # send headers in one piece, it is better than sending them one by one
    tcp_nopush on;

    # don't buffer data sent, good for small data bursts in real time
    tcp_nodelay on;

    gzip on;
    # gzip_static on;
    gzip_min_length 10240;
    gzip_comp_level 1;
    gzip_vary on;
    gzip_disable msie6;
    gzip_proxied expired no-cache no-store private auth;
    gzip_types
        # text/html is always compressed by HttpGzipModule
        text/css
        text/javascript
        text/xml
        text/plain
        text/x-component
        application/javascript
        application/x-javascript
        application/json
        application/xml
        application/rss+xml
        application/atom+xml
        font/truetype
        font/opentype
        application/vnd.ms-fontobject
        image/svg+xml;

    # allow the server to close connection on non responding client, this will free up memory
    reset_timedout_connection on;

    # request timed out -- default 60
    client_body_timeout 30;

    # if client stop responding, free up memory -- default 60
    send_timeout 10;

    # server will close connection after this time -- default 75
    keepalive_timeout 75;

    map $http_upgrade $connection_upgrade {
        default upgrade;
        ''      close;
    }

    # Write temporary files to /tmp so they can be created as a non-privileged user
    client_body_temp_path /tmp/client_temp;
    proxy_temp_path /tmp/proxy_temp_path;
    fastcgi_temp_path /tmp/fastcgi_temp;
    uwsgi_temp_path /tmp/uwsgi_temp;
    scgi_temp_path /tmp/scgi_temp;

    # Include custom configurations
    include conf.d/*.conf;
}
Esta es una configuración por defecto, adaptarlo a tus necesidades.
Realizado todas estas configuraciones ya podemos levantar el servicio
Ejecutamos en la terminal
docker-compose up -dNos debe mostrar algo como esto

Podemos entrar al contenedor y verificar que esta corriendo sin problemas

Genial ahora como último paso recuerdas que al inicio te comente que estábamos usando Traefik, solo nos quedaría crear una entrada en nuestro archivo hosts (etc/hosts) y agregamos la url que definimos en nuestro docker-compose.
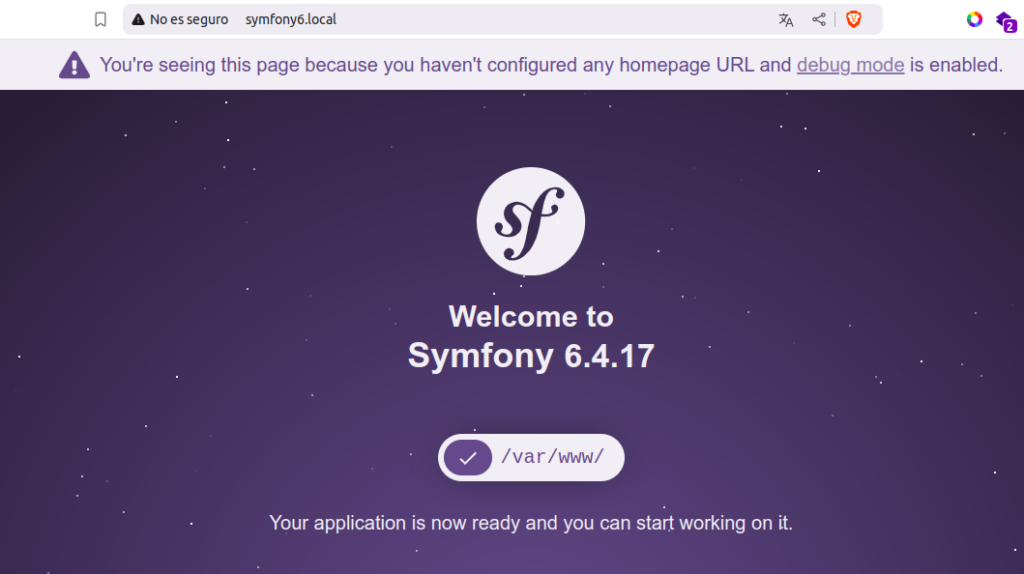
127.0.0.1 symfony6.local www.symfony6.localSi entramos a nuestro navegador escribiendo la ruta: http://symfony6.local nos debería mostrar la siguiente página

Como puedes ver está es una guía super sencilla de como poder instalar Symfony con Docker.
